
When the design team at QRP Labs (alright, we know that means just Hans) set out to produce a multiband portable transceiver that would be packed with advanced features and could be sold for as little as a meager purse of groats, what was their primary design objective? You can bet your life it was not to make a radio fit for the battlefield; a ruggedized, virtually indestructible box of electromagnetrickery.
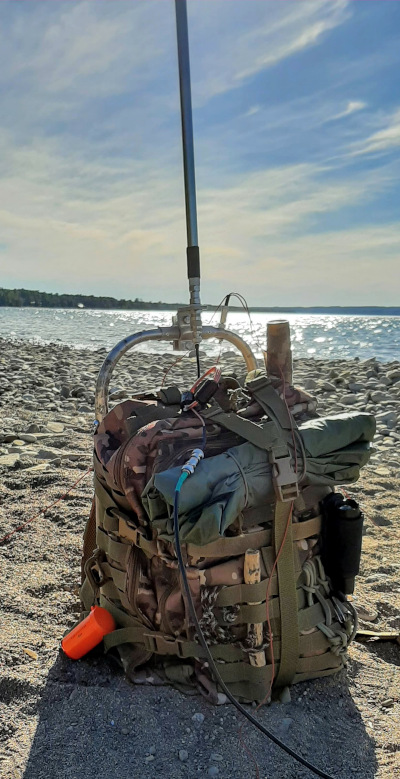
And when the product matured sufficiently to go to market, what emerged from that tiny rural corner of the former Ottoman Empire? We certainly have to admire the final product; its a marvel of miniaturization that packs a truly extraordinary set of advanced features. But, not only that, the shopping list of features continues to evolve. The QMX is a Software Defined Radio – new features are added by updating the firmware. Now, how can we make it bulletproof and ready for the rigors of the great outdoors?
No criticism is intended. Those of us who sent our meager purse of groats over to the boundary between the western world and the Orient knew what we were getting. And, yes, we received more than fair value for our money. But the story doesn’t end there. When a vendor produces a high end product that can be bought for the kind of price you might expect to barter in a Moroccan souk, or in the street markets of Akihabara, you hand over your lira and know that’s when your own work begins.
Do you think you can just take such a radio to the field and expect it to perform flawlessly forever? I hope to persuade you of the folly of that idea.
I know it’s tempting to treasure that very small form factor and to display and celebrate it every time you carry it to the field. QRP Labs was very successful in packing most of the hardware into a very small form factor, but overlooked a few things. For example, compare the QMX to the newer Elecraft KH1 handheld radio. The KH1 has an internal battery and antenna matching unit; the QMX has neither. To be fair, there is a huge price difference.
So, a battery has to be provisioned outside the box. Ditto for an antenna matching unit, if required. Not a biggie? True except for one thing – external components require ports (aka “holes”) and each hole is a potential failure point.
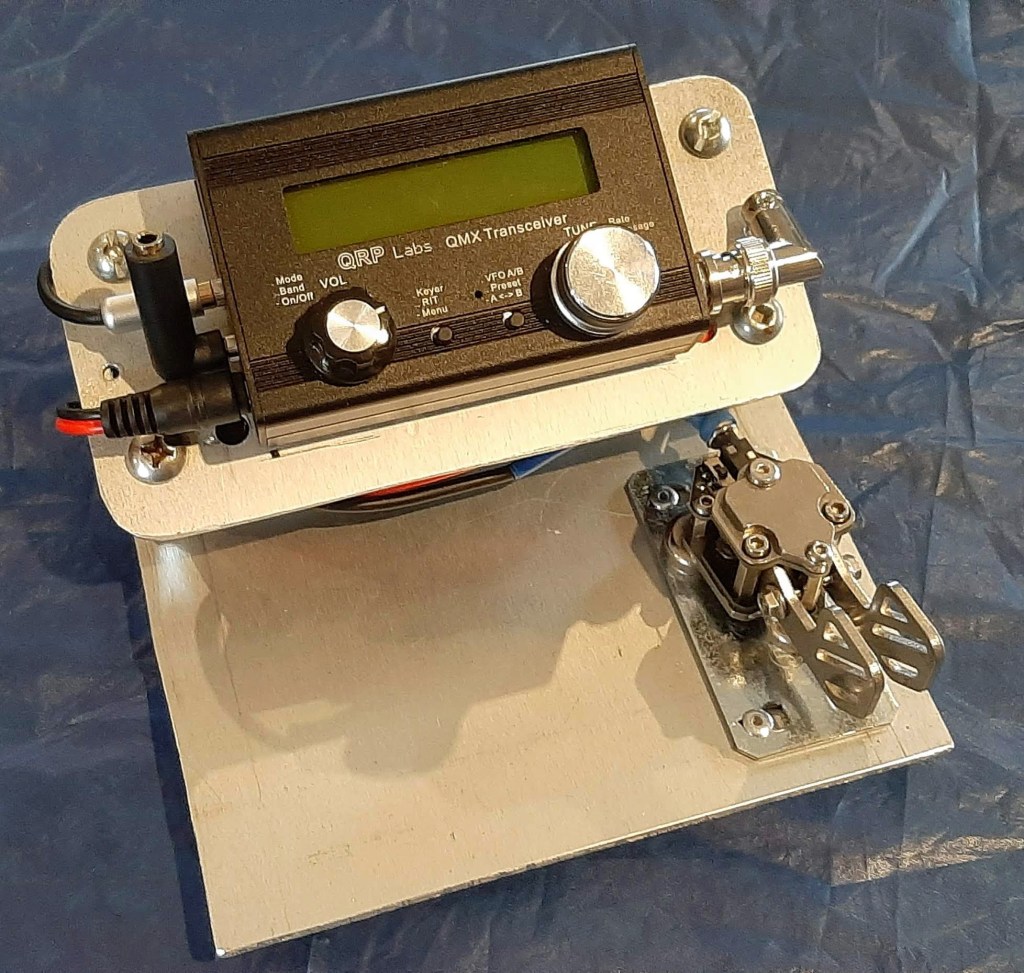
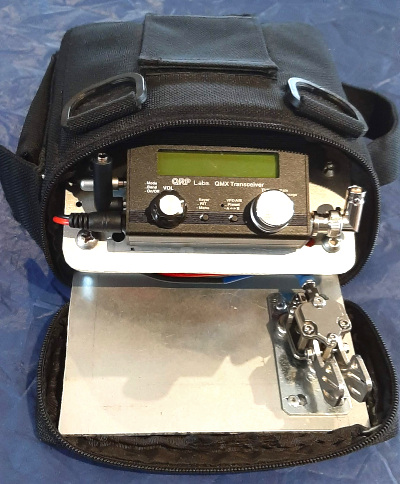
Referring to the diagram at the top of this post, there are seven holes in the QMX case. Let’s look at each one in turn, beginning at the bottom left and working clockwise. First up: the DC supply jack. This is a DC5521 standard barrel connector. The QMX is rated for a 12 volts supply. Step over the limit of 12 volts and you enter the danger zone. Accidentally pull the plug out before first powering down the radio and in you are in the danger zone. Remember, the QMX is a software driven radio; if it suddenly loses power the processor is left in an unknown state. Good luck with that.
Drok around the clock
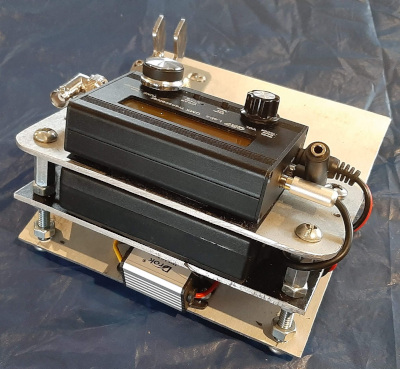
The Ham Radio Outside the Box solution: regulate the battery supply so it can never enter the danger zone. I have tried the simplest way using a diode; it worked, but as the battery voltage dropped out of the danger zone it was necessary to power down the radio and replace the DC supply lead with a straight through cable. This was replaced with a Drok waterproof buck converter. No matter whether my QMX is powered by a Talentcell 3Ah LiIon battery or the same brand LiFePO4 battery – or any other power source – my treasured QMX is safe from overvoltage.
Pop go the finals!
By the way, overvoltage is mainly a danger while matching a high SWR antenna. Fortunately, the QMX has 4 fuses that protect the radio against high SWR. Unfortunately, on the other hand, these fuses do double duty as power amplifier transistors and blowing them may put a damper on your day’s radio fun. Think you’re safe because you only use resonant antennas? Think again, resonant antennas are no longer resonant when the wind blows them down, or a dog collides with your wire while chasing a frisbee.
Going back to the idea some users have of celebrating the tiny form factor by disconnecting all external devices after use. Problem. Maybe a fatal problem. Remember what we said about accidentally disconnecting the battery without powering down the radio first? Can you be sure that when that pesky deer fly takes a chunk out of the back of your neck while you are operating, that you won’t leap to your feet and cry out in anguish, first at the pain, then at the pile of tangled wires and equipment lying on the ground by your feet? The HROTB solution: keep everything securely connected; saves wear and tear on connectors too.
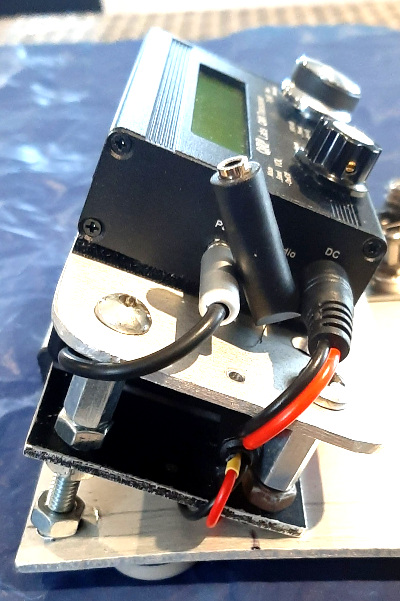
Wow, that’s a lot of danger wrapped up in just the first hole in the QMX case. Now let’s move on to the next one – the audio out jack. This is a 3.5mm TRS (Tip Ring Shield) jack. I have had bad experiences with this kind of connector – principally the ones installed on a couple of Icom handhelds I have owned. Such a tiny connector was probably never intended to last long following multiple insertions. They are often encountered on commercial consumer devices that get replaced every couple of years. I intend to get a lot more than 2 years use out of my QMX. Heck, I doubt if Hans will have finished releasing new features in that timeframe.
I have seen – no actually, felt – warning signs with my QMX. Inserting the headphone plug into this jack felt “lumpy” – like there was something inside jamming up the works. Bear in mind, my outdoor radio activities often take me to sandy beaches. Sand particles are not known to exhibit ferromagnetism (trust me, I have a Physics degree). Oh yeah? So why do I end up meticulously cleaning hundreds of grains of the stuff off my equipment at the end of an outdoor session? Static buildup? Yikes, that’s even worse! The HROTB solution: either leave the headphones permanently connected or use a short pigtail with a 3.5mm TRS plug on one end and a 3.5mm TRS jack on the other end.
I ended up using a very comfortable, quality set of earbuds with a TRRS plug and a microphone (such as is commonly used on mobile phones). I use an adapter that converts TRRS to TRS. The adapter stays inserted to protect the QMX TRS jack from the ingress of sand particles, dirt, and no-see-ums who may find the inside of the radio a very comfy place to lay their eggs and hatch many hundreds more baby bitey things.
I wonder if Hans has ever thought about replacing the TRS jack with a TRRS jack and using this as a way to connect a microphone when SSB is implemented on the QMX?
Moving along again. Next up is the paddle key jack. Again, this is a 3.5mm TRS jack. Same observations apply. Another portal open to ingress of foreign organic and inorganic matter that doesn’t belong in the radio. Same solution – keep it plugged!
I have wrestled with the problem of how turn my QMX into a handheld CW machine (like the Elecraft KH1). I haven’t found a solution yet. I can’t just plug a paddle key directly into the QMX; other connections get in the way. Pity, would be nice but not a show stopper. Any ideas?
That completes the left side of the radio. Before we move on to the right hand side there is one more little hole smack bang in the middle of the radio – right there in downtown front panel-ville. This one gives me the shivers – it’s a void in the case that provides direct, unimpeded access from the nasty outside world to the warm and comfy world inside the QMX. It is like a welcome sign offering safe haven for moisture, bugs and dust particles to come right on in and interfere with my radio fun. Worse still – due to the capillary effect it not only invites the ingress of nasty stuff, it may actually suck moisture inside. Ouch! Not sure how to stop that happening. Even when SSB is available I won’t be using it, so maybe I can cover that tiny hole permanently.
Over on the starboard side of the case we find three more connection points. One of them is a BNC RF connector which doesn’t actually present a wormhole to the interior of the radio. However, to reduce wear and tear I have fitted an elbow connector that also facilitates connection of an antenna when inclement weather forces the QMX to retreat inside its protective case.
At the top on the right hand side of the case is a type C USB jack. As a CW op I don’t use this connection in the field but it becomes important when it is time to update the radio’s firmware. I haven’t come up with an easy way to protect it yet. Suggestions are welcome.
Finally, there is another 3.5mm TRS jack marked “PTT” which seems to be intended for connecting the QMX to an amplifier (What? Isn’t 5 watts enough already?). Since I don’t use this “hole” I have left it unprotected for now.
Ok, maybe you are the kind of operator who operates exclusively from inside your vehicle. That is okay for POTA but strictly forbidden for SOTA. Your QMX is less likely to be exposed to the elements but consider this; every time you connect and disconnect your peripherals you are putting stress on tiny, consumer-grade connectors and, eventually they are going to fail. This is true, not just for the incredible QMX, but for most consumer grade amateur radio equipment. A notable exception is the Lab599 Discovery TX-500 which has mil-spec connectors and is waterproof – but in a different price bracket.
The QRP Labs QMX is a wonderful product but operating it out in the Big Blue Sky Shack where it is exposed to the vicissitudes of real world environmental conditions is stretching it beyond its perceived design parameters. The onus is on us, the users, to add the needed layers of protection – or shell out the big bucks to buy a radio built to military standards.
Help support HamRadioOutsidetheBox
No “tip-jar”, “buy me a coffee”, Patreon, or Amazon links here. I enjoy my hobby and I enjoy writing about it. If you would like to support this blog please follow/subscribe using the link at the bottom of my home page, or like, comment (links at the bottom of each post), repost or share links to my posts on social media. If you would like to email me directly you will find my email address on my QRZ.com page. Thank you!
The following copyright notice applies to all content on this blog.

This work is licensed under a Creative Commons Attribution-NonCommercial-NoDerivatives 4.0 International License.
Discover more from Ham Radio Outside the Box
Subscribe to get the latest posts sent to your email.

That portable QMX package is coming along nicely, John.
Keep a handful of short, right TRS “pigtails” on hand to act a sacrificial connectors which protect the jacks on your equipment from repetitive stress failures. I use one on the “key” jack on my FT-818 so that, hopefully, I’ll never have to replace the one on the circuit board.
LikeLike
Thanks Matt. This is going to be a continuing project; I’m not happy with it yet. Maybe I should buy a QMX+ to get the larger case so I can put the battery and Drok regulator inside. The QMX+ was introduced right after I had placed my QMX order and it would have been my preferred choice. The QMX is cute but I can’t see the point if it’s not a complete radio.
LikeLike
John, loved your article on the QMX. It’s not for me as I don’t do Mouse Code, only FT8 at QRP levels, however I have passed it on to a couple of CW operators who may be interested.
As for the three uncovered holes, why not just use a small piece of electrical tape to cover them over. It’s easy to put on, you can take it off when you want to use a USB C port etc, and best of all for hams, it’s cheap. You’ve probably already got a roll in your carry bag.
Jim
LikeLike
Thanks for the feedback Jim. The simplest ideas are often the best. Your fix has been applied!
LikeLike
Search Amazon for USB-C dust protection plugs.
LikeLiked by 1 person